


You’ve bought a new point and shoot or SLR camera. Now what? You’re wondering what else do I need and what are all the buttons and features of my camera, let alone how do I get the best shots? Our Manual Mode Photography Tutorial hopes to answer all your questions!
But before we get to all those settings, just a few words about equipment. To go straight to the settings guide, click here.
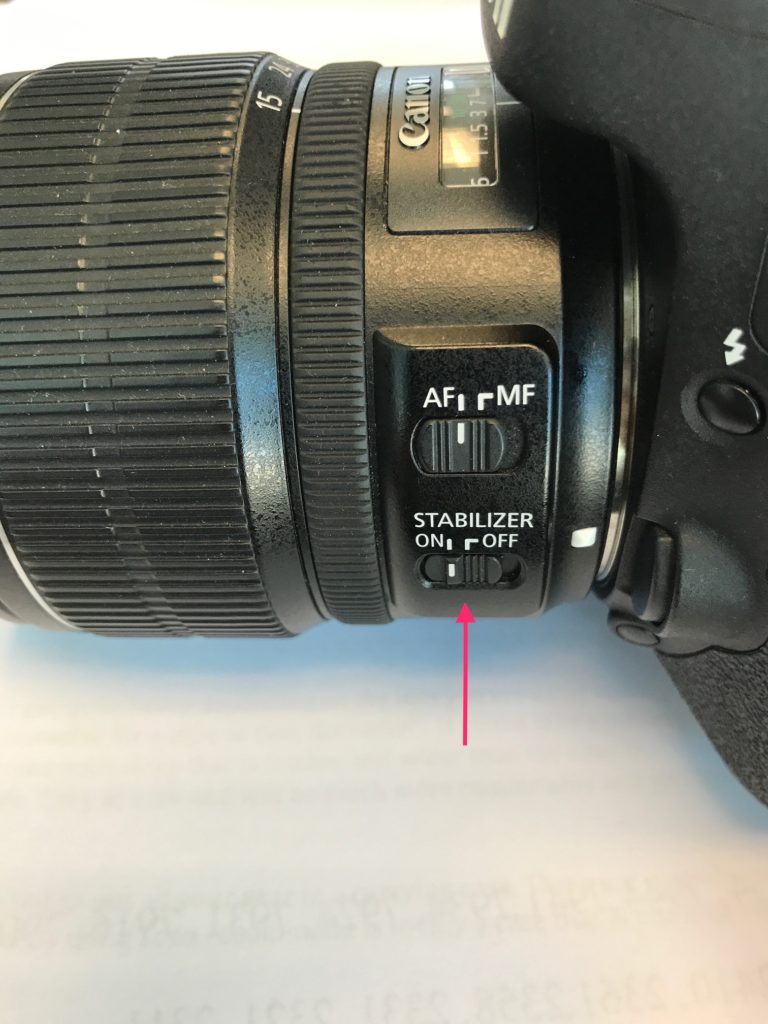
What type of lens shall I buy? They say that the lens or “glass” that you buy is more important than the camera body itself. The better the lens, the sharper and crisper you’re images will look. You’ll want to have a couple lenses in your bag to cover most of the focal lengths you’ll be photographing. You’re first lens should be one that covers 15-85 mm and the second one should cover the 70-300 mm range. IS or Image Stabilization is a feature that you want to have as well. The IS feature reduces shaking caused by your hand. Another feature that you want to consider when buying a lens is Ultrasonic or Hypersonic. This refers to the motor inside the lens and how fast and silently it focuses. You wouldn’t want to scare off a bird or a deer with a loud lens as you’re trying to focus in on the animal.

What additional equipment do I need? The first thing you want to get is a couple good memory cards. Buy a Class 10 memory card from either SanDisk, Lexar or PNY. The Class 10 memory cards allow you to take videos without any buffering. Once you put your memory card in the camera, you want to format the card. This will initialize the card and set it up for use with the particular camera you installed it in. If you change cameras, you will want to format the card again in the different camera, but beware, every time you format the card, it completely and forever deletes all files and photos from the card. The reason why you want multiple memory cards is just in case something happens to the card or you run out of space. It’s always good to carry extra memory cards.
The next thing you want to buy is an extra battery for your camera. The last thing you want to happen is for your battery to die before the grand finale. They are easy and quick to change.
Do I need a polarizing filter? A polarizing filter for your lens is a good idea as they will lessen or eliminate reflection, give more contrast and richer colors to your photos. Just remember to remove the polarizing filter when you are shooting at night or indoors.

Shall I change my neck strap? SLR’s get quite heavy depending on the lens you are using and if you are hiking up to that waterfall for a mile or two, the camera is gonna take a toll on your neck. Buy a neoprene neck strap that is thicker and wider than the ones that come with the camera. They stretch and will be much more comfortable and giving around your neck.
What size carrying case should I get? You’ll need to put all your gear in a carrying case. There are many shapes and sizes, but the only thing I can recommend is to buy a case that is one size bigger than you think you need. There will always be extra gear or new things you buy that will take up space.
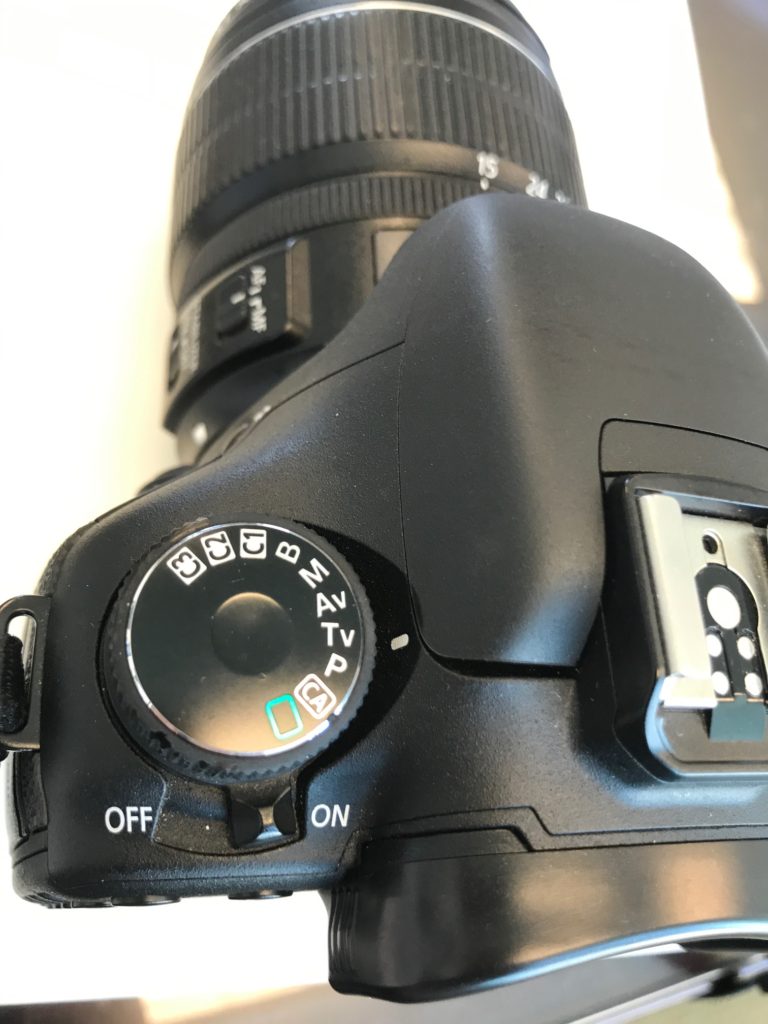
What mode shall I shoot in? You’re now ready to TREK and take pics. You’ve spent a good amount of money on a nice camera with all these bells and whistles, so why not use it. Get off the “Automatic” mode! Put the camera in the “P” or Program mode. This is the same as the Automatic mode, but allows you to make certain changes. Remember, you have a digital camera and you can take as many test shots as you want until you get your desired settings and the pictures looking exactly the way you want.
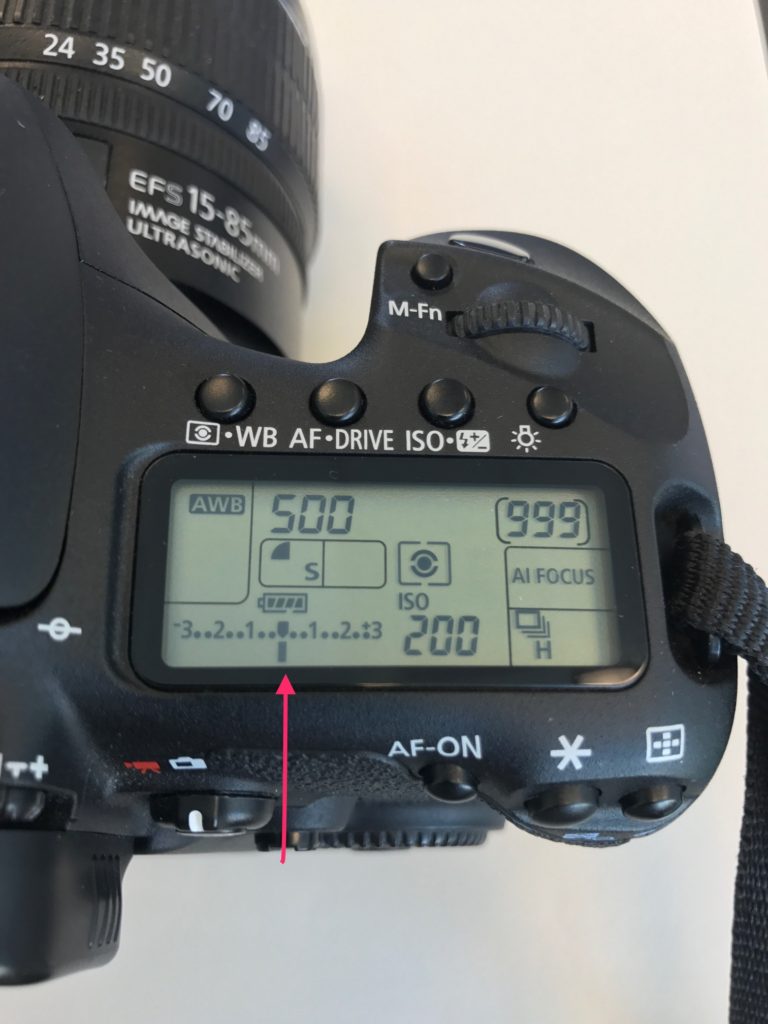
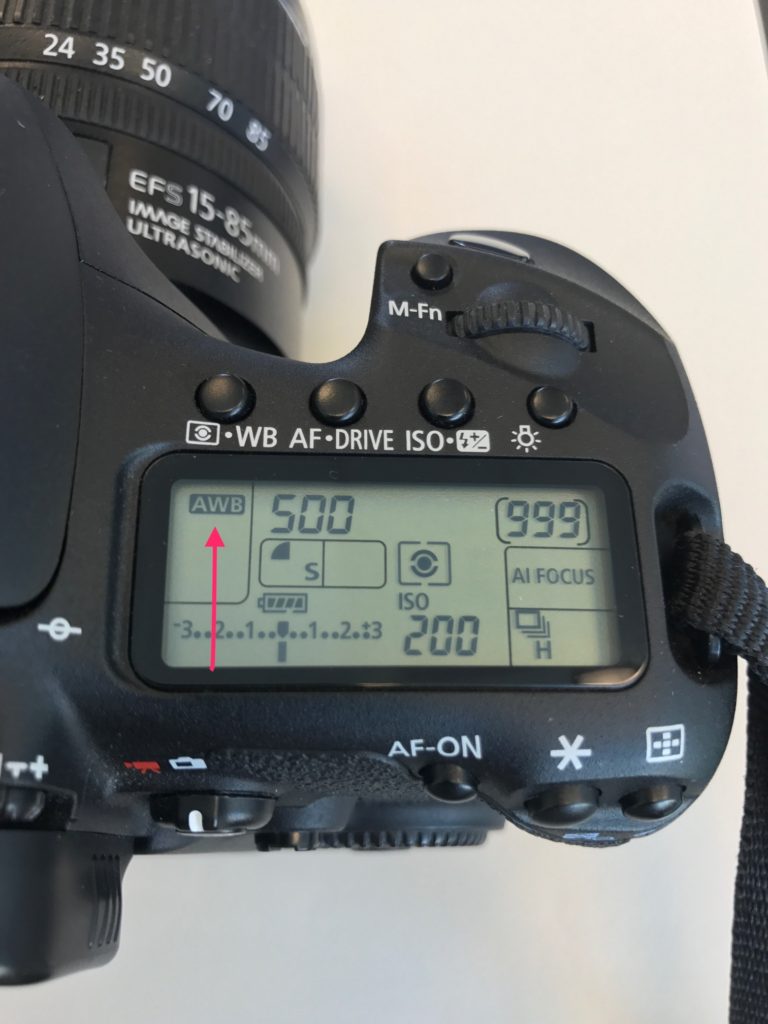
What is exposure compensation? The first thing you can play with and adjust is the exposure compensation. It’s the numbers on your screen that go from -3 to +3. By using the dial you can set your preferred exposure level to brighten or darken an image as you like. You use this when an image does not look like with the naked eye. The live view mode is a great way to see how your image will turn out by making certain adjustments.
When should I use flash? Flashes that come with a camera are typically good for between 10-12 feet. If you want to take pics of a subject further away, you’ll need to invest in larger and brighter flash. Use the flash when the subject is backlit or in the shade. If you don’t want a silhouette, use the flash to fill the subject. A neat trick for taking pictures of people wearing hats or someone in front of a window or mirror is to turn the camera upside down so that the flash fires from below and into the face. Another rule of thumb to remember is if you are taking vertical shots to turn the camera so that side of the flash is facing the side of the person with the darker clothes or skin. Think of a Bride and Groom. You want to have the flash on the side of the Groom.
If your subject is prone to red-eyes, don’t use the red-eye reduction feature in your camera. It’s always better to use the editing software to make correct it.
What’s the best way to hold a camera? The last thing you want are blurry pictures. Put one leg in front of the other to be as steady as possible. Put your elbows in so that they are touching your body. One hand goes underneath the camera and one goes on the grip with one finger on the shutter button. Very important! Don’t be in a rush to look at the picture you just took. Once you gently push down the shutter button, you need to allow the camera to complete taking the picture, otherwise you will have a blurry photo.
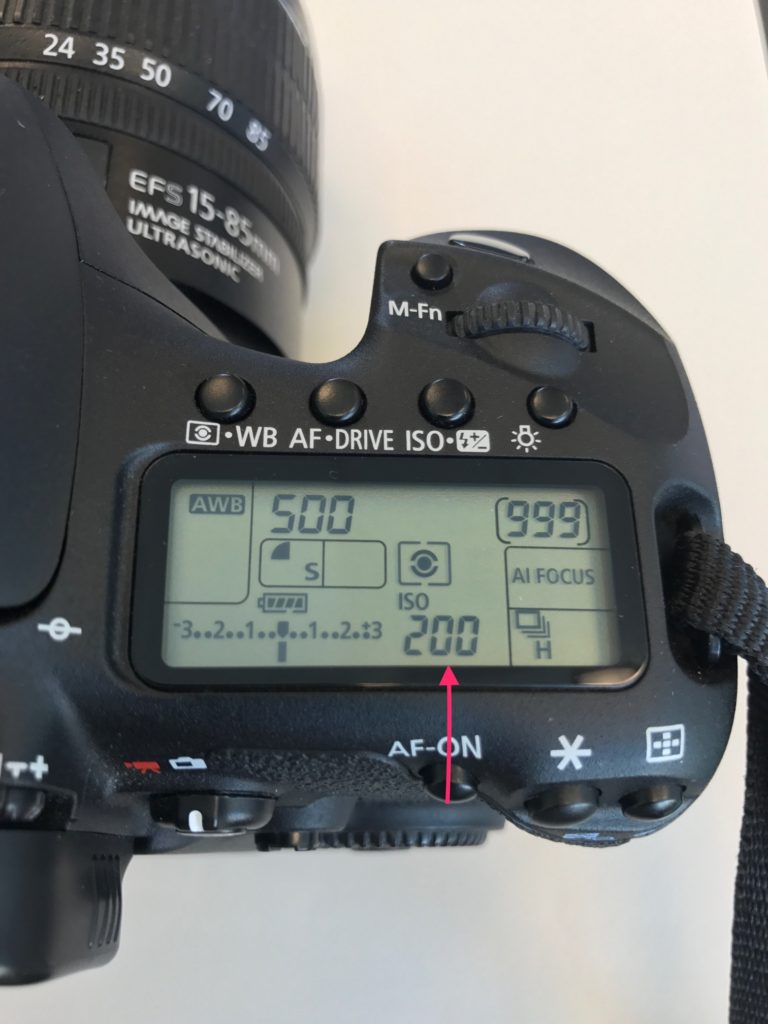
What is ISO? ISO stands for International Organization for Standardization. It is basically the camera’s sensitivity to light. You want to use the lowest ISO possible if you are taking pictures without a tripod. Change the ISO first before you change the exposure. The typical ISO settings for Landscapes is ISO 100, Daylight is ISO 200 and Sports is ISO 400. Of course, this will all vary depending on the time of day and amount of light available. The higher the ISO you use, the more “noise” or pixelation you will have in the picture.
What is White Balance? White Balance is considered one of the most important settings of a digital camera. Depending on the type of lighting you are taking pictures under (the color temperature) and the light source, will dictate how your pictures turn out. Different white balance settings can change the mood of each photograph. Always take a test shot in AWB, which is Auto White Balance and see how it looks. There are several settings in the WB mode that you can explore and see what looks best to you. One recommendation is that when you are shooting indoors and in darker places, put the White Balance on the flash mode and use the flash.
Shutter priority mode (Tv): The shutter priority mode is used when motion is the most important aspect of your photograph. Do you want to “stop” action or do you want to show action or movement? It’s all what you want to achieve. The slower the shutter speed the more movement you will see in the photograph. 500th of a second is the slowest speed that you can stop action. At 1000th of a second you can stop all sports action. Let’s take waterfalls for example. Do you want to show the waterfall completely still and frozen or do you want to show movement in the waterfall and have that silky look? A 5-6 second shutter speed will make water look like fog. Try 2-3 seconds and see what look you prefer. Without a tripod the slowest speed that most people would be able to take a photograph is typically 1/8th of a second without any shaking and blur. Anything slower than that requires a tripod to keep things steady and get a crisp shot. If you are shooting sports, set your camera’s AF Drive to AI Servo. This will allow you to continuously focus on the subject while you have your finger on the shutter button pressed half way. The camera identifies the subject and tracks it while maintaining the focus until you decide to take the shot. You can also put your shooting drive in burst mode so that as you fully press and hold the shutter button down it will take pictures continuously. That way you don’t miss any of the action and you get the right shot desired. A neutral density filter can help on a bright day to cut out the light when you are using slower shutter speeds to capture movement. At shutter speeds of one minute or more, you will make all moving objects disappear. Try it out.
Aperture priority mode (Av): The aperture value of priority mode is used to control the depth of field. Do you want the entire picture to be in focus or do you only want the person or object in focus and everything else blurred and out of focus? To obtain a large depth of field and have more things in focus you want a narrower aperture, which is identified by a larger f-number (i.e. f/11 or f/16). To throw the background out of focus, you’ll want a wider aperture to have a smaller depth of field (i.e. f/1.4 or f/2.8). The larger the number, the more things you will have in focus. For landscapes you typically want to use a higher f-stop and for portraits a lower f-stop. Important! If you are using a tripod, make sure to turn the IS feature off so that the camera isn’t always shaking slightly as it is trying to stabilize.
What are metering modes? 95% of the time you will be using Multi or Matrix Metering. However, when the subject is lit via a spotlight or a concentrated beam of light such as statues, other art objects and even the moon, use the spot meter mode. This will evaluate the light around your focus point and ignore everything else. Also, subject that are back-lit, spot metering will avoid having silhouettes.

Finally, here are some tips and tricks to take better and different photos than the rest of the population. Don’t be that person that goes to the Grand Canyon and sets up a tripod next to everyone else at the same height to capture the same image of a sunrise or sunset. Instead, sit down, lay down or stand higher than everybody else. In other words, be creative and change your angle and point of view to capture that stunning shot.