


Like many other serious and professional photographers these days, I have accumulated a large amount of gear and tools for taking photos in various situations and projects, however, having the best gear money can buy isn’t going to necessarily yield amazing photographs. One must possess the basic and fundamental knowledge of photography concepts, and this post hopes to provide some travel photography tips for beginners. A keen eye and imaginative vision to turn those same concepts into visions, and in turn into images, is a talent that is gained after many years behind the lens. Finally, truly understanding all the controls of the camera to achieve the desired effect and mood is critical. Proper quality, quantity, and direction of light, mindful composition, and the story-telling are what make an image impactful.
With that in mind, having the right tools make any job easier, so for doing professional work, or in situations where cameras such as a Point-and-Shoot cannot produce the desired results, a more sophisticated camera, correct choice of lenses, and lighting system is required.
Each genre and type of photography offers its own challenges and mastery of them takes many years of practice. These days, I focus on Travel, Landscape, Nightscape (taking photos at night with a landscape in the foreground) and Lifestyle photography. The reason being is it encourages and allows me to travel and experience our wonderful planet. Making memorable photos during sunrise, sunset, and at night from our Milky Way and billions of stars is relaxing and spiritual. While traveling, I try to capture the details to construct a full story of my journey, places to visit, stay, eat, and explore. I also add in the people, their culture, history, architecture, and the unique and surreal landscapes at day and night. Once I post my photos on Social Media and blogs, I receive a lot of feedback and questions from people who are interested in exploring and planning their vacation in the same spots. This sharing by itself adds to the joy of photography.
Allow me to share with you some examples and explain the overall techniques and setups in capturing each image.
- A wide angle lens (16-35 mm or a fixed prime like 14 mm) is a must for a travel photographer. It allows capturing epic shots and tells the full story and new locations. Adding a human element in the photo shows scale and makes the image more impactful.

Canon 5D Mark IV, f/2.8, 0.4 sec., ISO 100, 16-35 mm lens, tripod mounted
2. Always try to find a unique perspective and angle to capture a shot where thousands of others have taken a similar photo. This requires one to be observant of his/her surroundings. In the shot below, I have focused on the plant, and getting close to the subject, I have used a wide aperture (f/4) to create a shallow depth of field to make the waterfall out of focus.
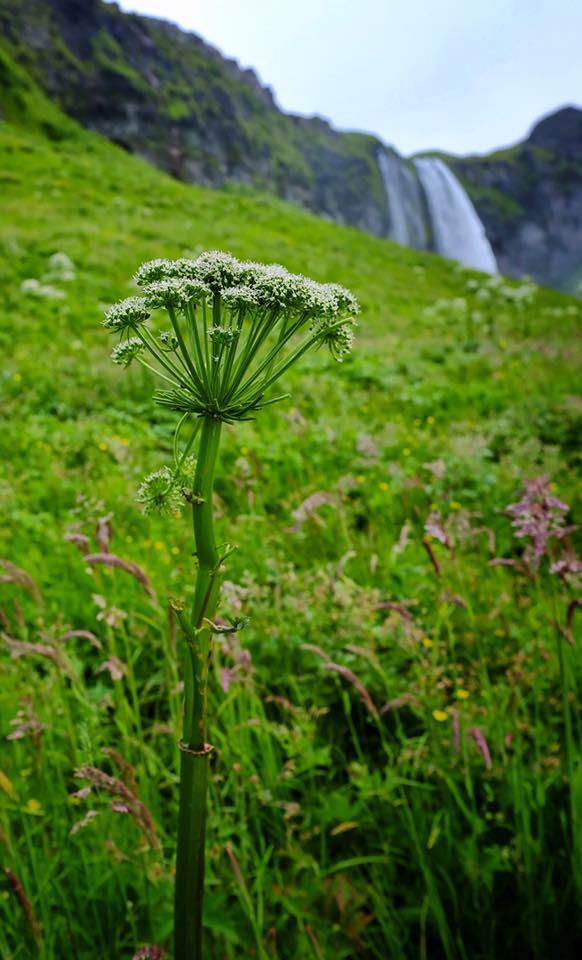
Standing at over 200 feet tall (60 meters), Seljalandsfoss is one of Iceland’s most famous waterfalls. Taken with FujiFilm X100F
3. Photography is all about patience and waiting to capture the right moment. Fill the frame to show the details and eliminate distractions. Look for symmetrical or repeating patterns and notice an element that breaks that pattern. Use leading lines and composition to make a stronger image.
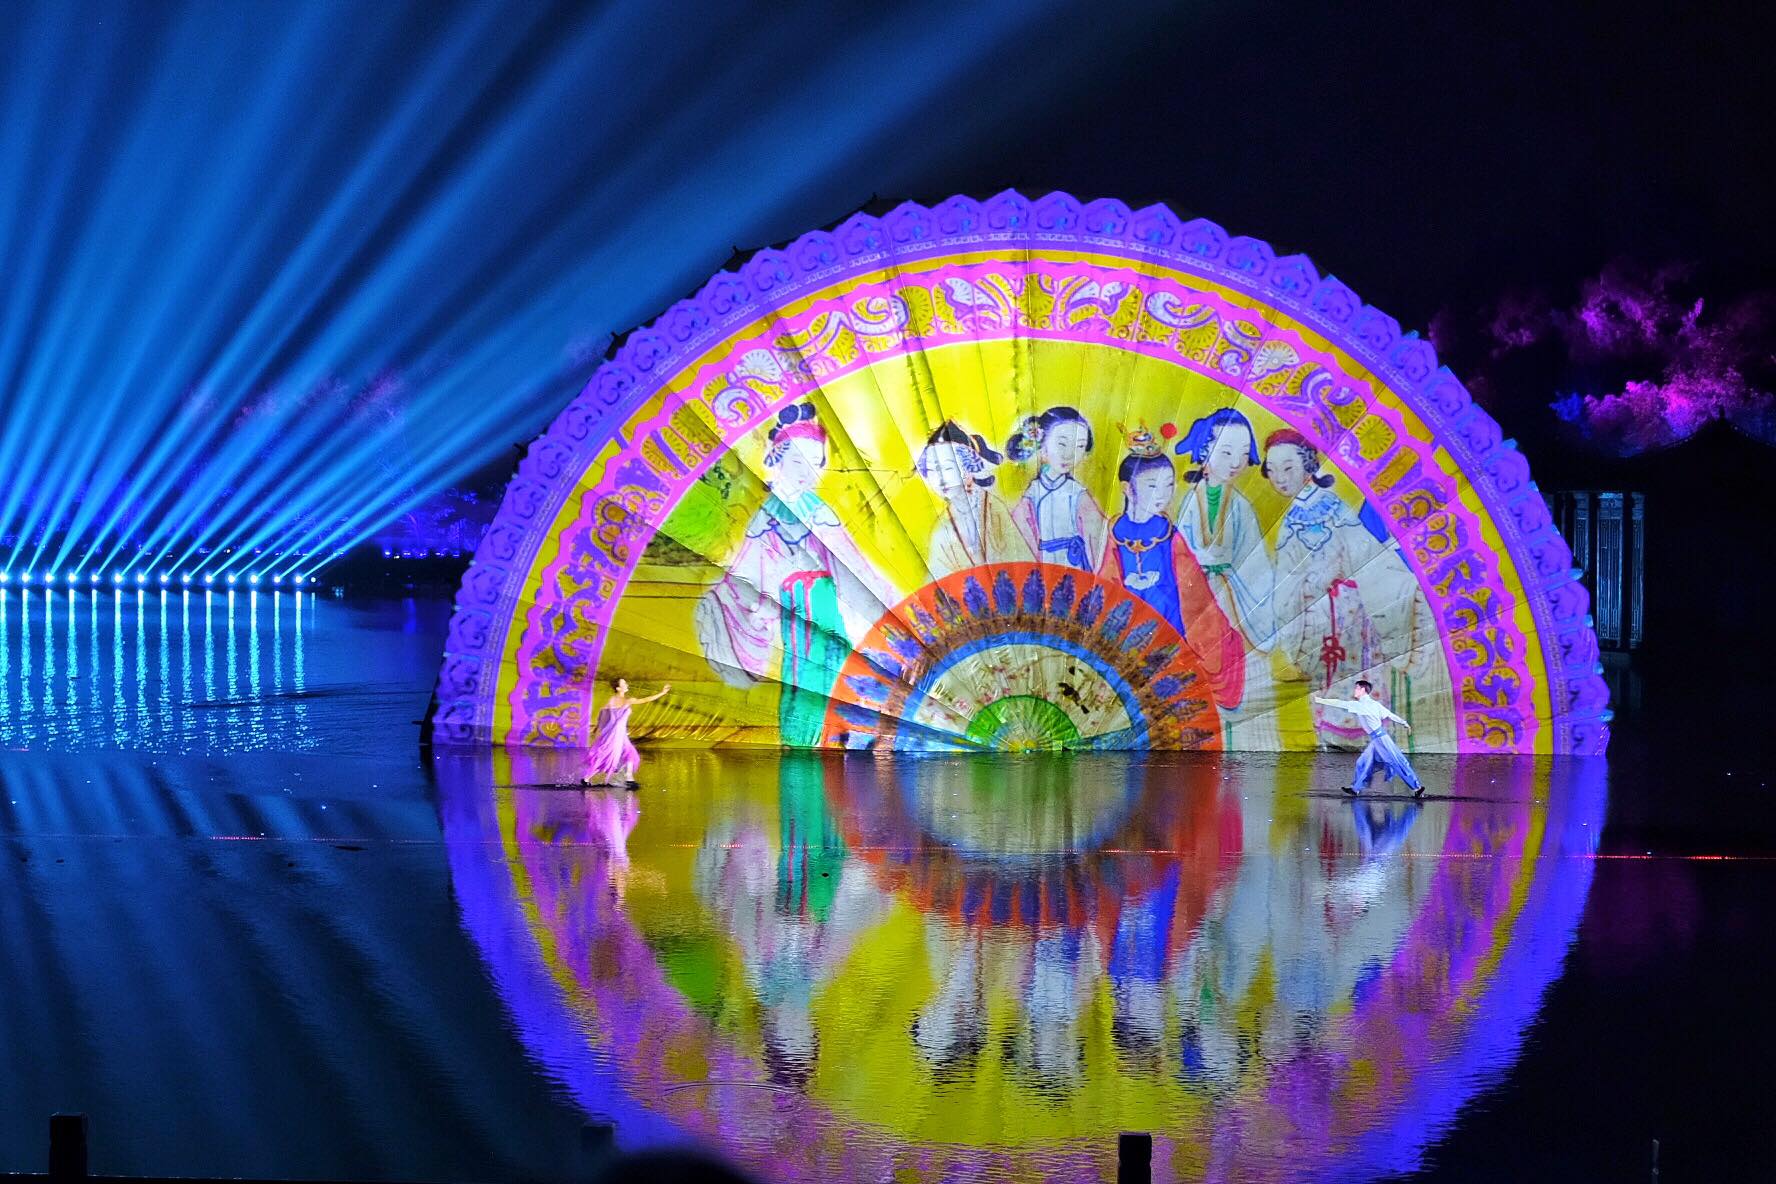
Performed for the G20 Summit in 2016
Taken with FujiFilm X100F
With many visitors to the monastery below, I had to wait almost 20 minutes to find a 10 second window for exposure and light-painting, with no one crossing. A technique to make people disappear is to use very slow shutter speeds (1-2 minutes); of course an 8-12 stop ND filter is required to achieve the correct exposure. In this case, as long as people move around, they become “ghosts” and will not show up in the photo.
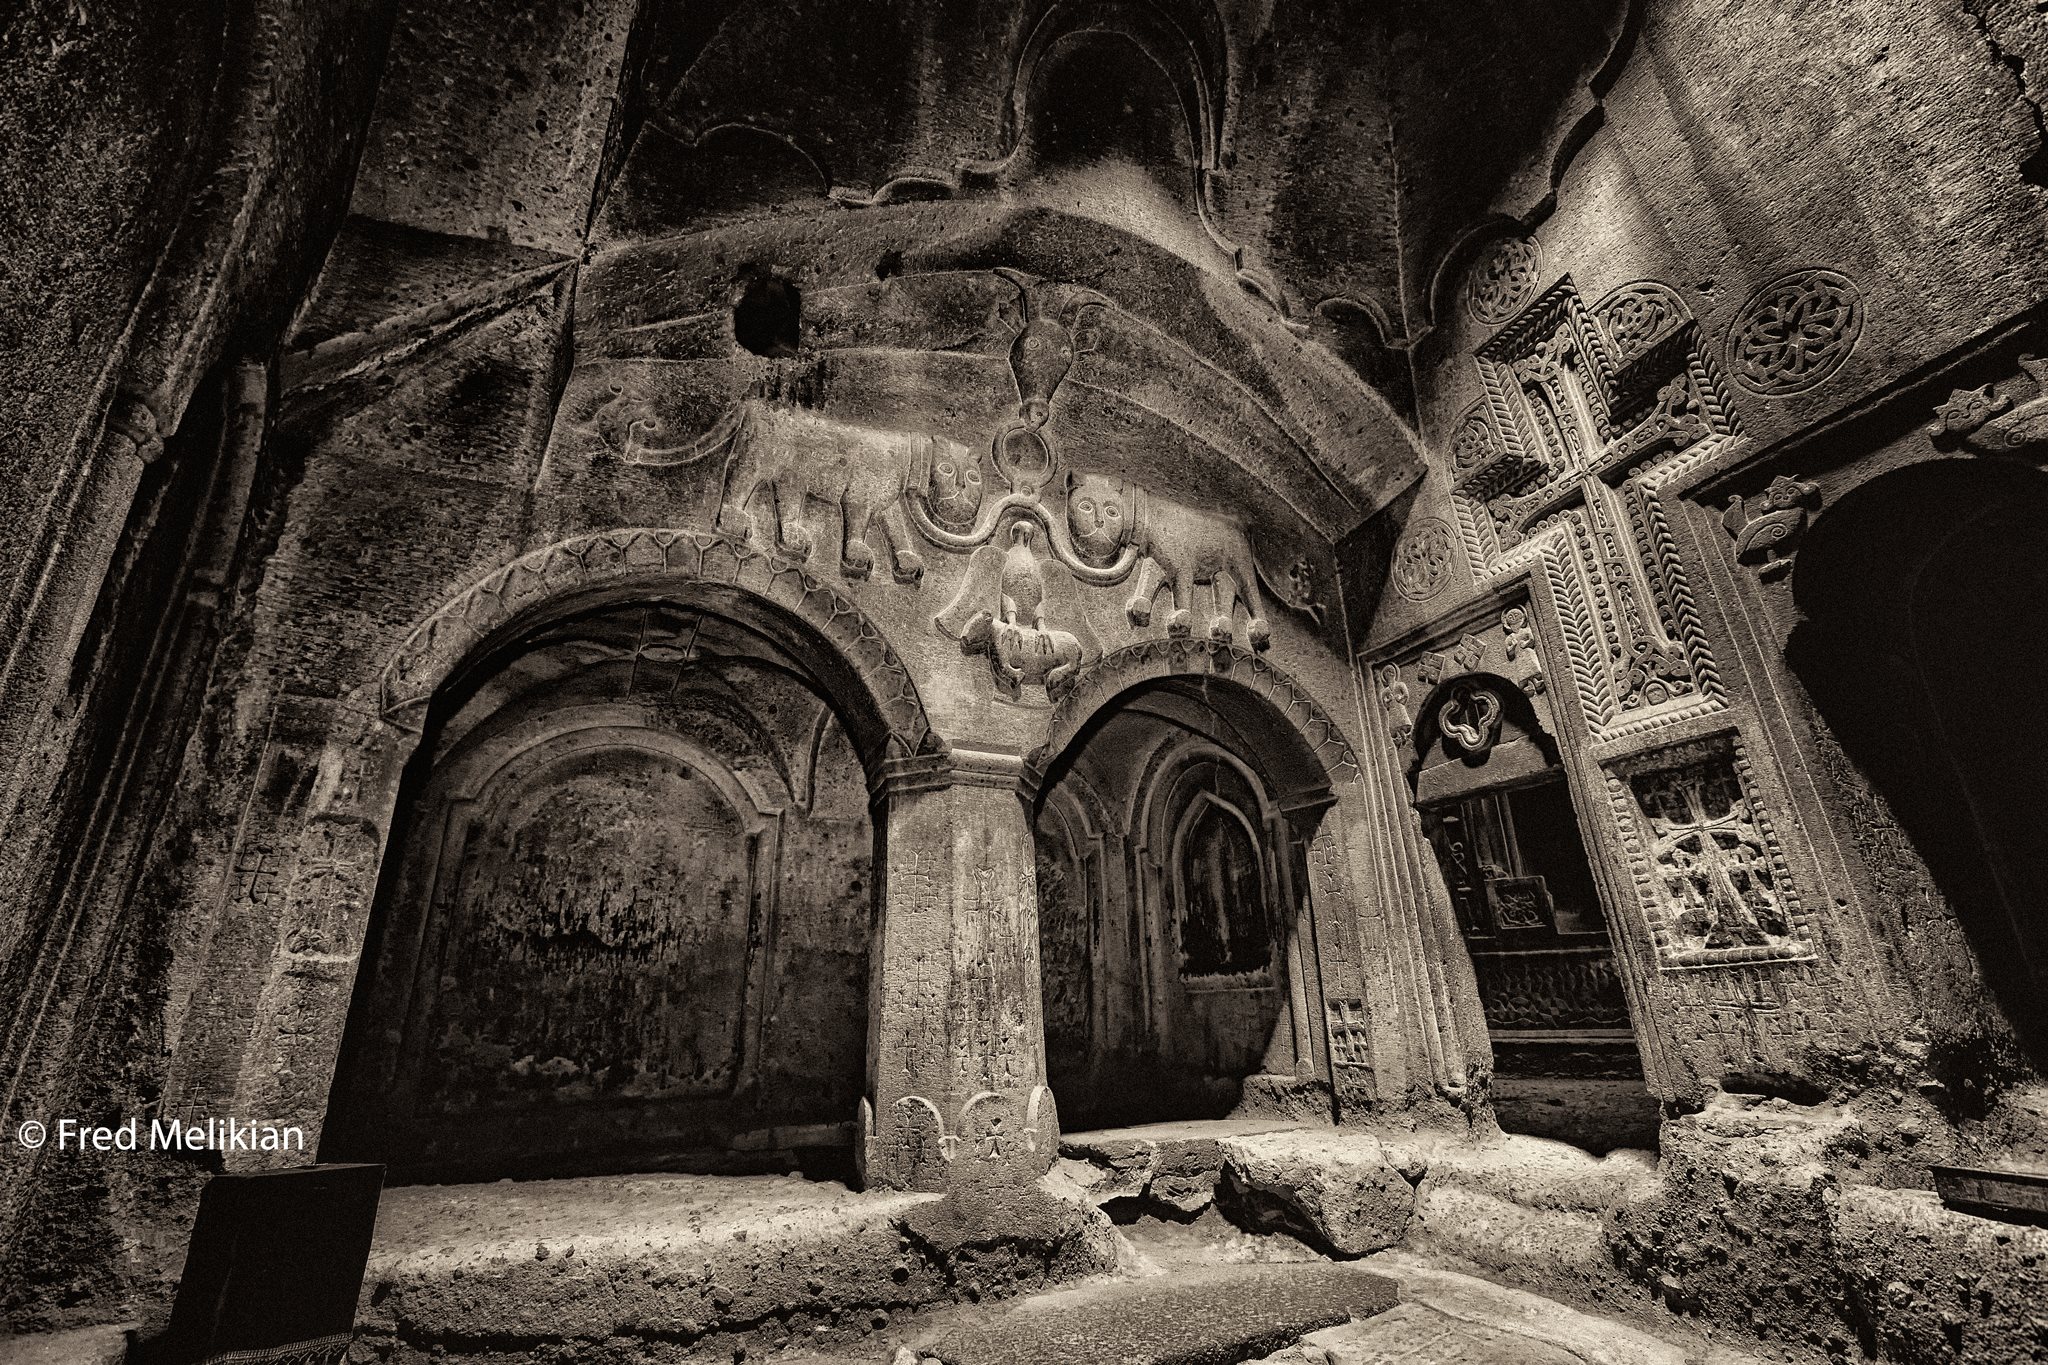
The two chained lions and an eagle with half-spread wings, whose claws grasp a calf is the coat of arms of Proshian Princes.
Geghardavank means “the Monastery of the Spear”. It originates from the spear which had wounded Jesus at the Crucifixion, allegedly brought to Armenia by Apostle Jude, called Thaddeus in Armenian, and stored amongst many other relics. Now it is displayed in the Echmiadzin treasury museum.
Canon 5D Mark IV, f/8, 10 sec, ISO 100, selective light-painting with an LED light to bring out the details.
4. Anticipate the moment and be ready. With our modern digital cameras, many sequences (5-10 fps – frames per second) of shots can be taken at higher shutter speeds to capture the peak of the action.
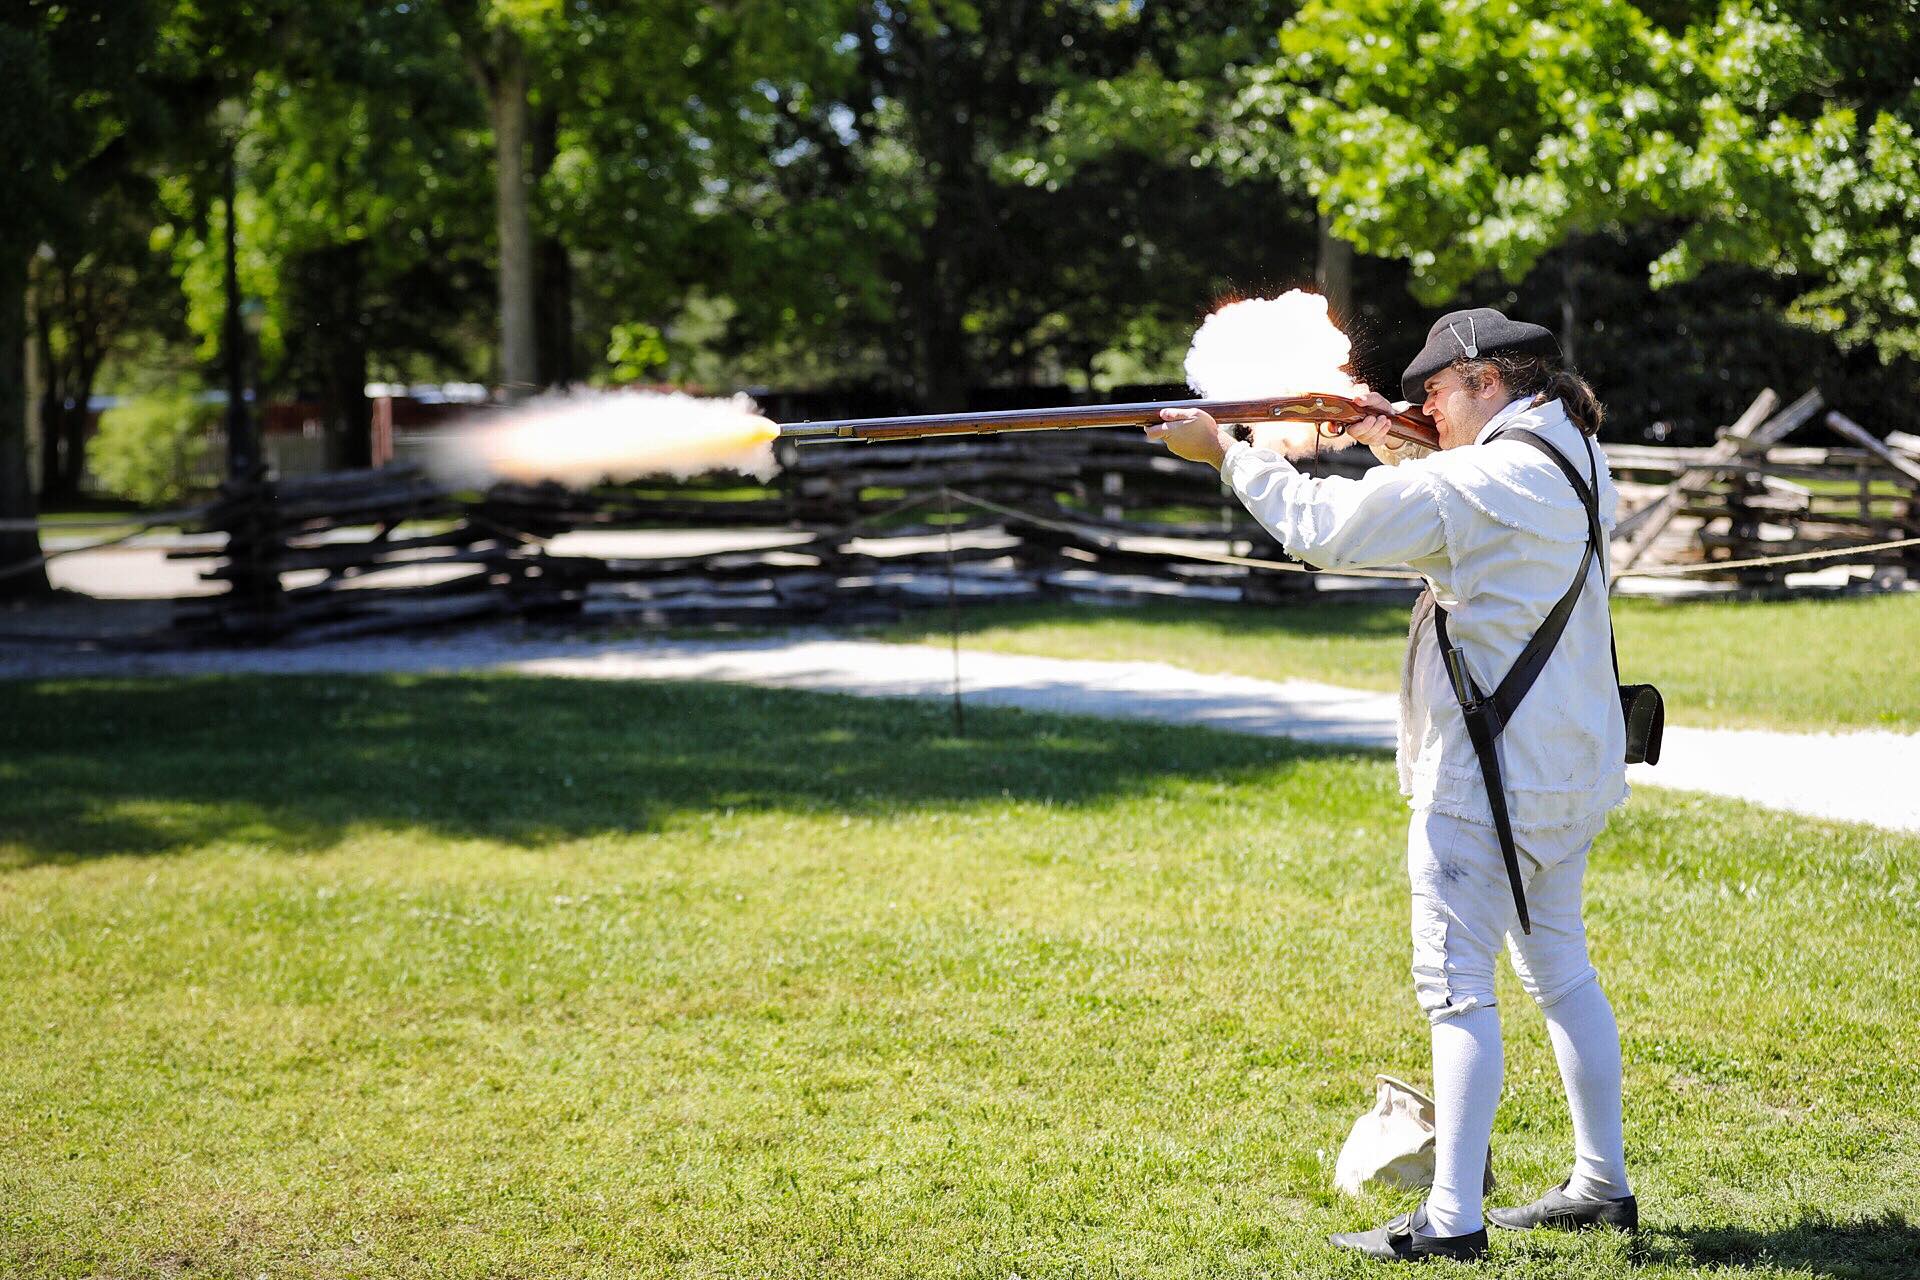
Colonial Williamsburg, VA
5. Don’t forget to make an image of the moment in your own memory. Immerse yourself in the power and beauty of nature. Take a small tripod with you. JOBY Gorillapod tripod is quite handy to set up on a rock or attach to a tree branch.
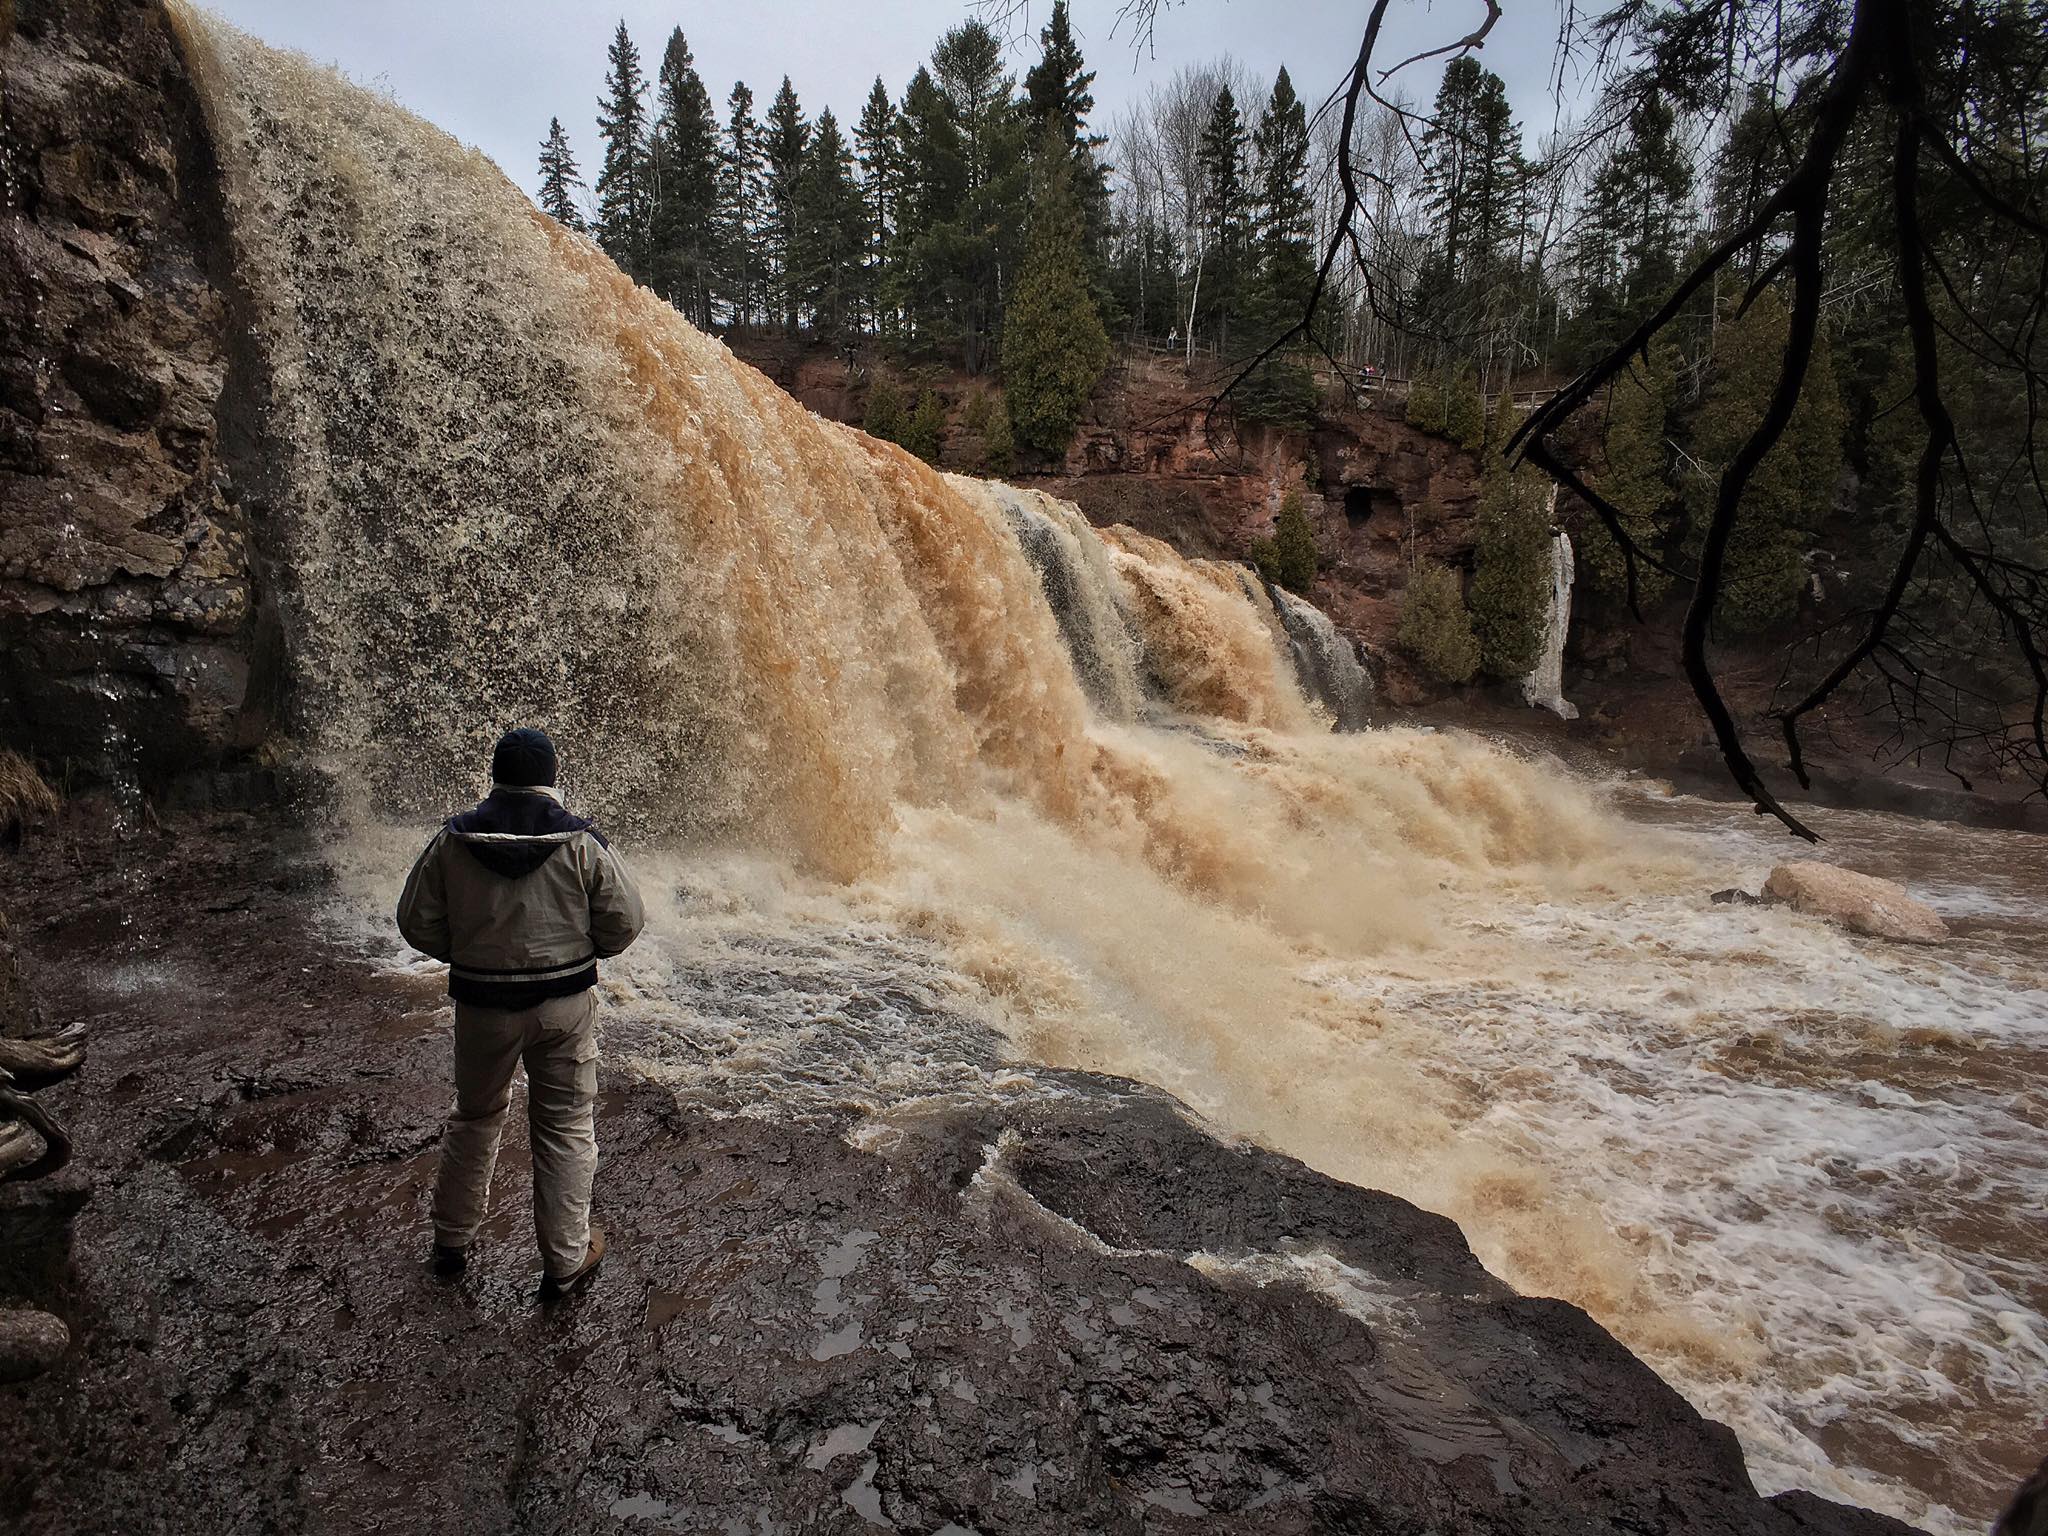
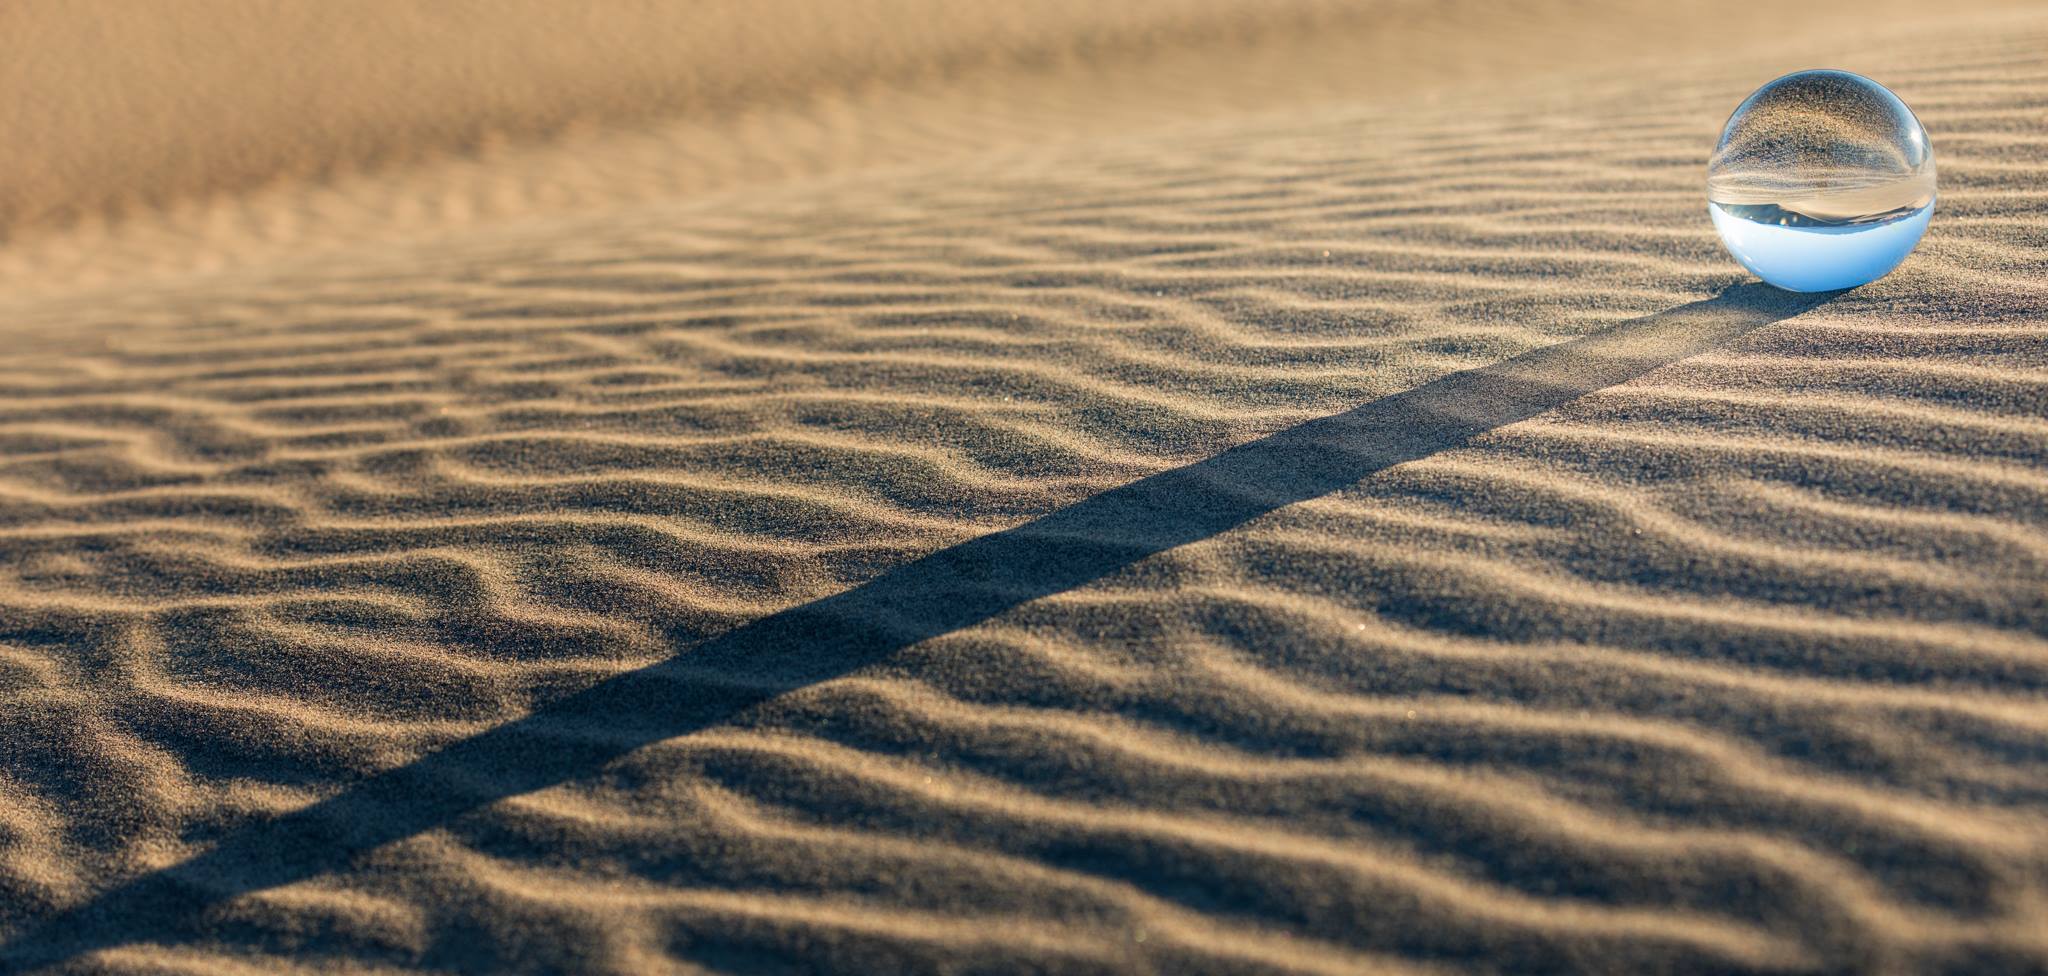
6. Visit the same spot at different times of the year. Each season offers its own beauty. Great shots are made by visiting the same location over and over again in different lighting situations and seasons. In the shot below, I have used an ND (Neutral Density) filter to be able to use a slower shutter speed (1-2 sec.) and make water look “creamy”. Variable ND filter is a must in any photographer’s bag. An ND filter is also a good alternative and substitute for HSS (High Speed Sync) flash photography.
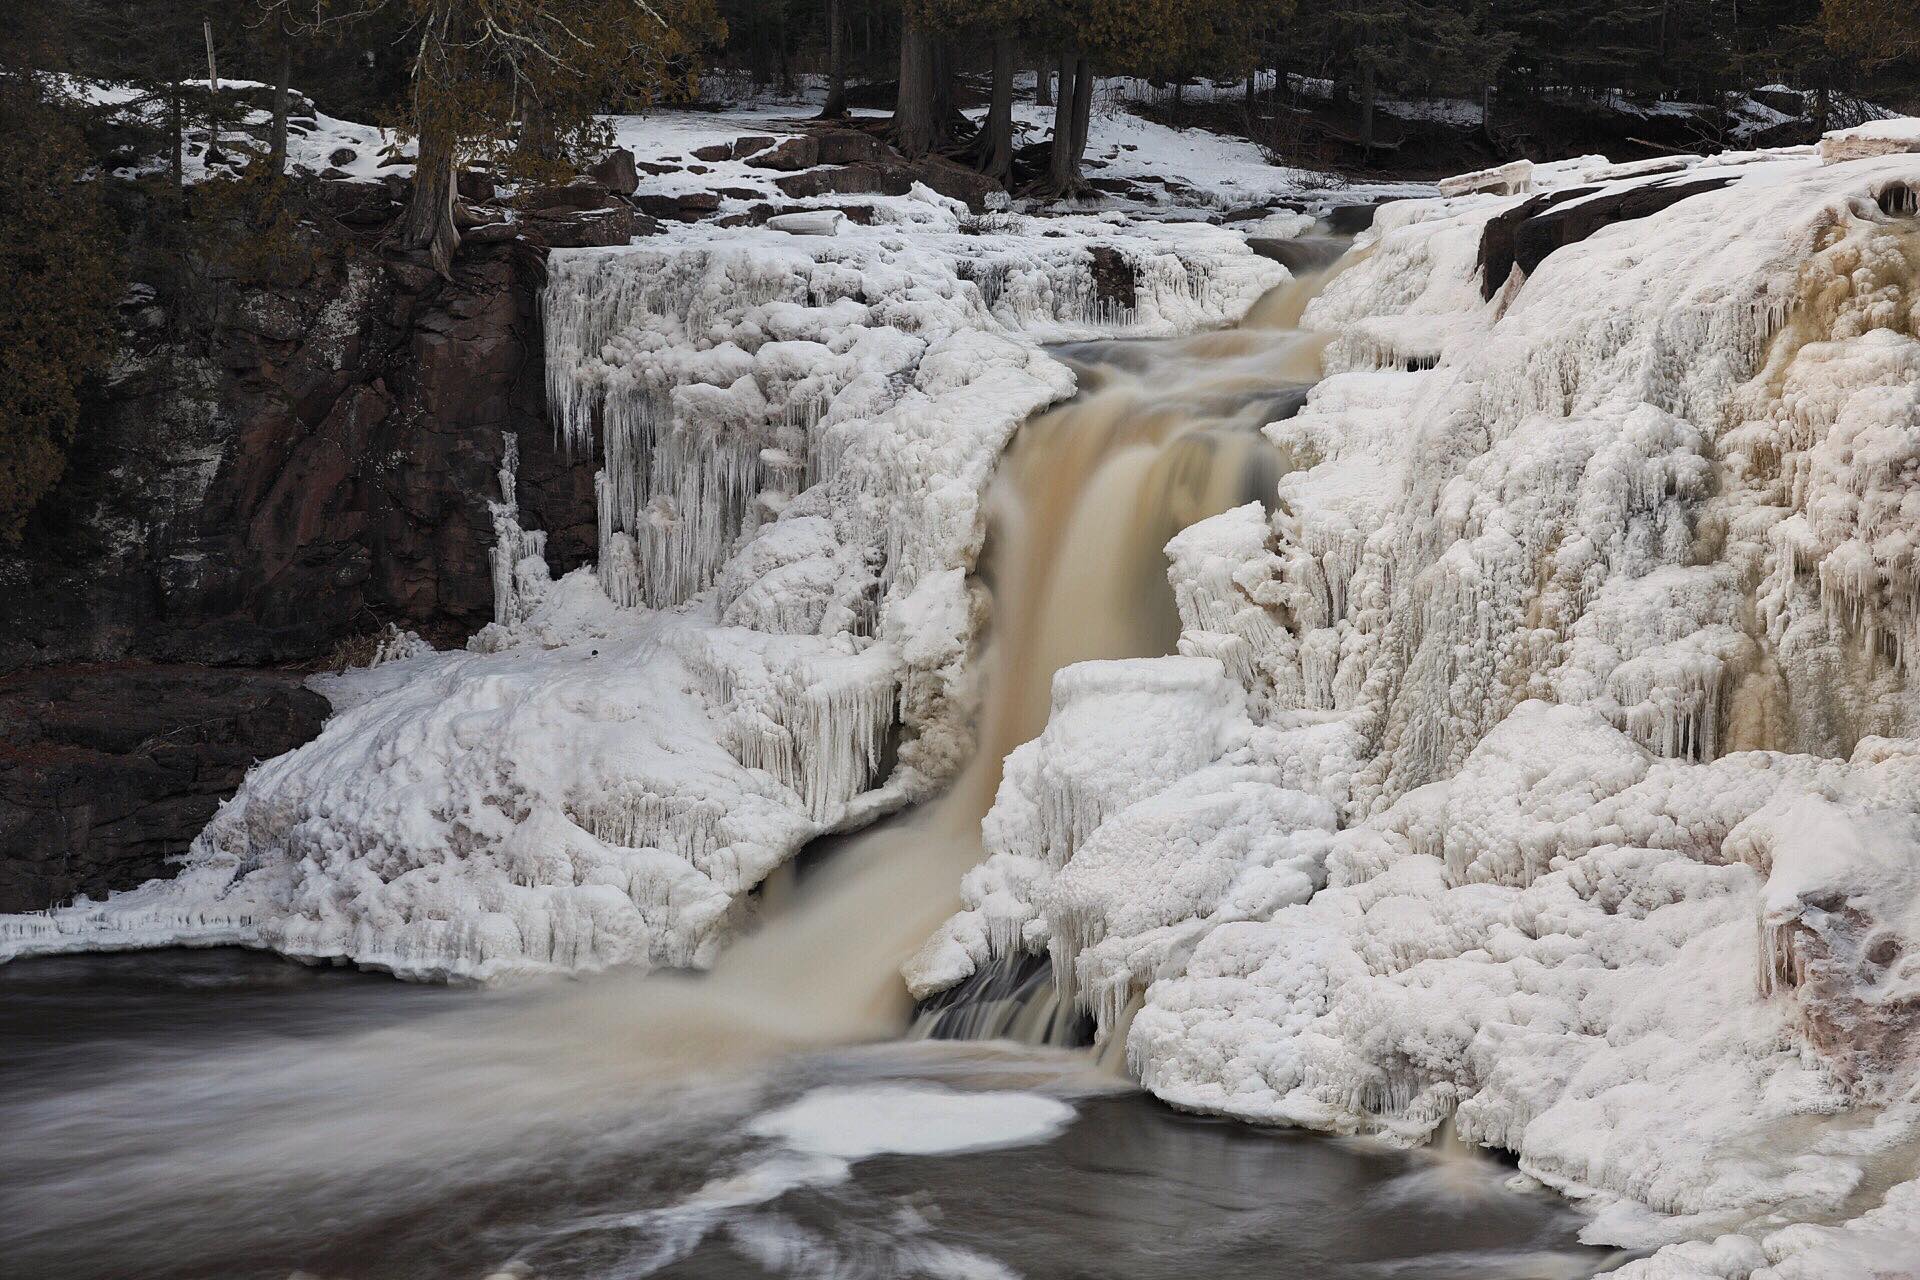
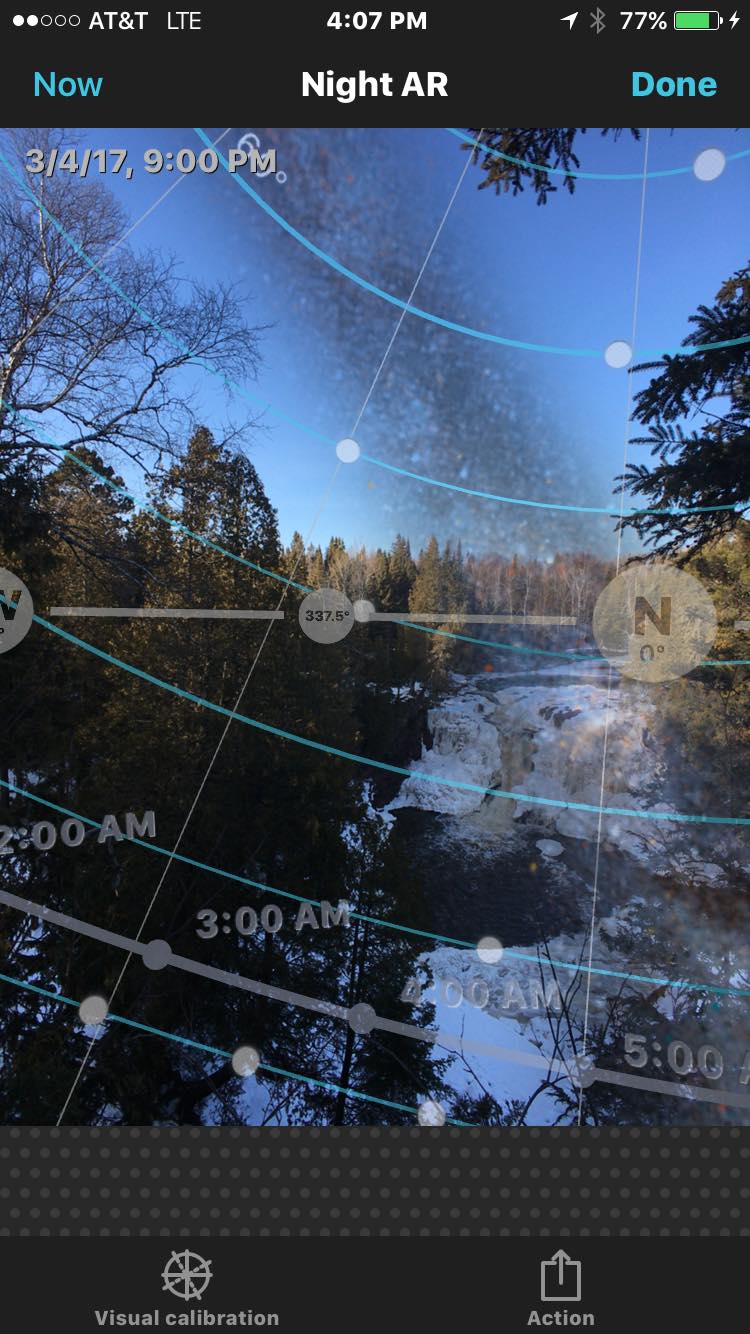
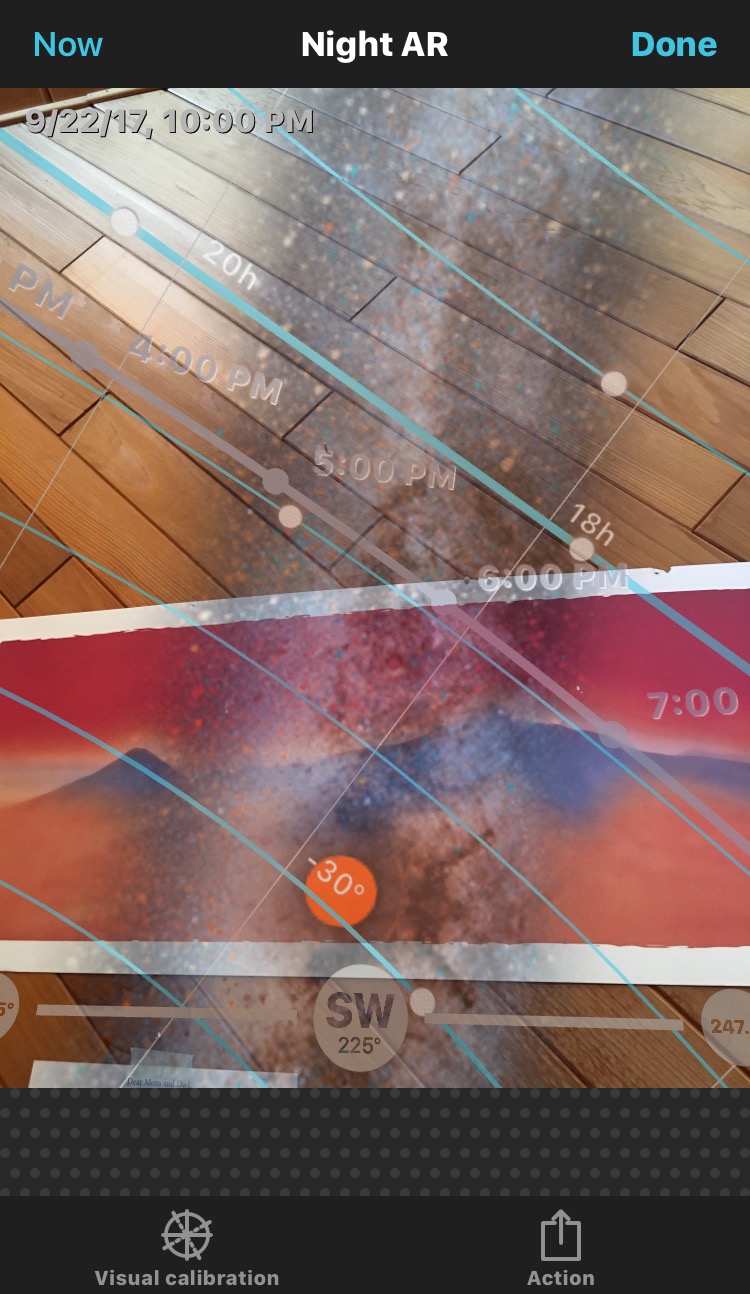
7. Plan ahead using Apps such as PhotoPills. Do location scouting to find the best spot with an interesting foreground (a rock, tree, building, hill/mountain, waterfall, etc.) for that awesome sunrise, sunset, or nightscape photography. Here, I am using PhotoPills’ Night AR (Augmented Reality) feature to find exactly where and when the Milky Way will be aligned with the Gooseberry Falls waterfall at 9:00 p.m. at a specific location. Later, I came back to the same spot at night and tried to take the shots. Unfortunately, the clouds came in and ruined my plans, so checking the weather and local clouds with Apps such as Wunderground helps with your planning.
Making plans to visit Lake Tahoe, I did a quick search with PhotoPills to check the position of the Milky Way ahead of time on Sep. 22, 2017. The Galactic Core (GC) is visible from 8:25 p.m. to 10:53 p.m. (between the gray and black lines) and is almost vertical, as shown in the Night AR (Augmented Reality) mode.
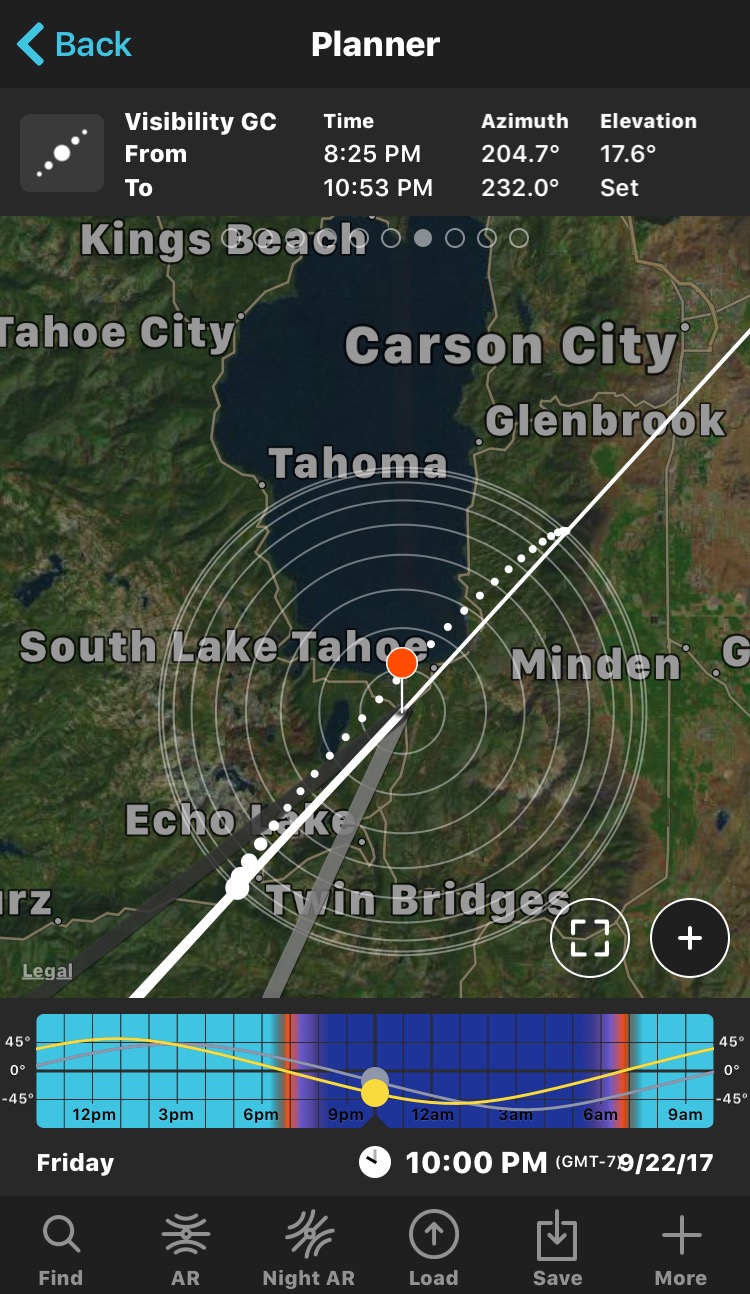
Night Augmented Reality of the Milky Way. The orange dot is the Galactic Core, just above the horizon.
8. The best photos are made during the “Golden Hours” of sunrise and sunset, when natural light has its best quality, quantity, direction and warmth glow. It creates deep shadows to give dimension to otherwise a 2-D flat photograph. Noon-time harsh sunlight is not the optimum light for photography. That’s the reason cloudy days offer much better softer light with the clouds diffusing the sunlight. As tourists with limited time, most often we don’t have a choice, so plan ahead to wake up early before sunrise (an added advantage is you will avoid the crowds), or be at the right spot for sunset shots. Night photography with light-painting is an exhilarating experience by itself under billions of stars of the dark skies and away from the cities’ light pollution.
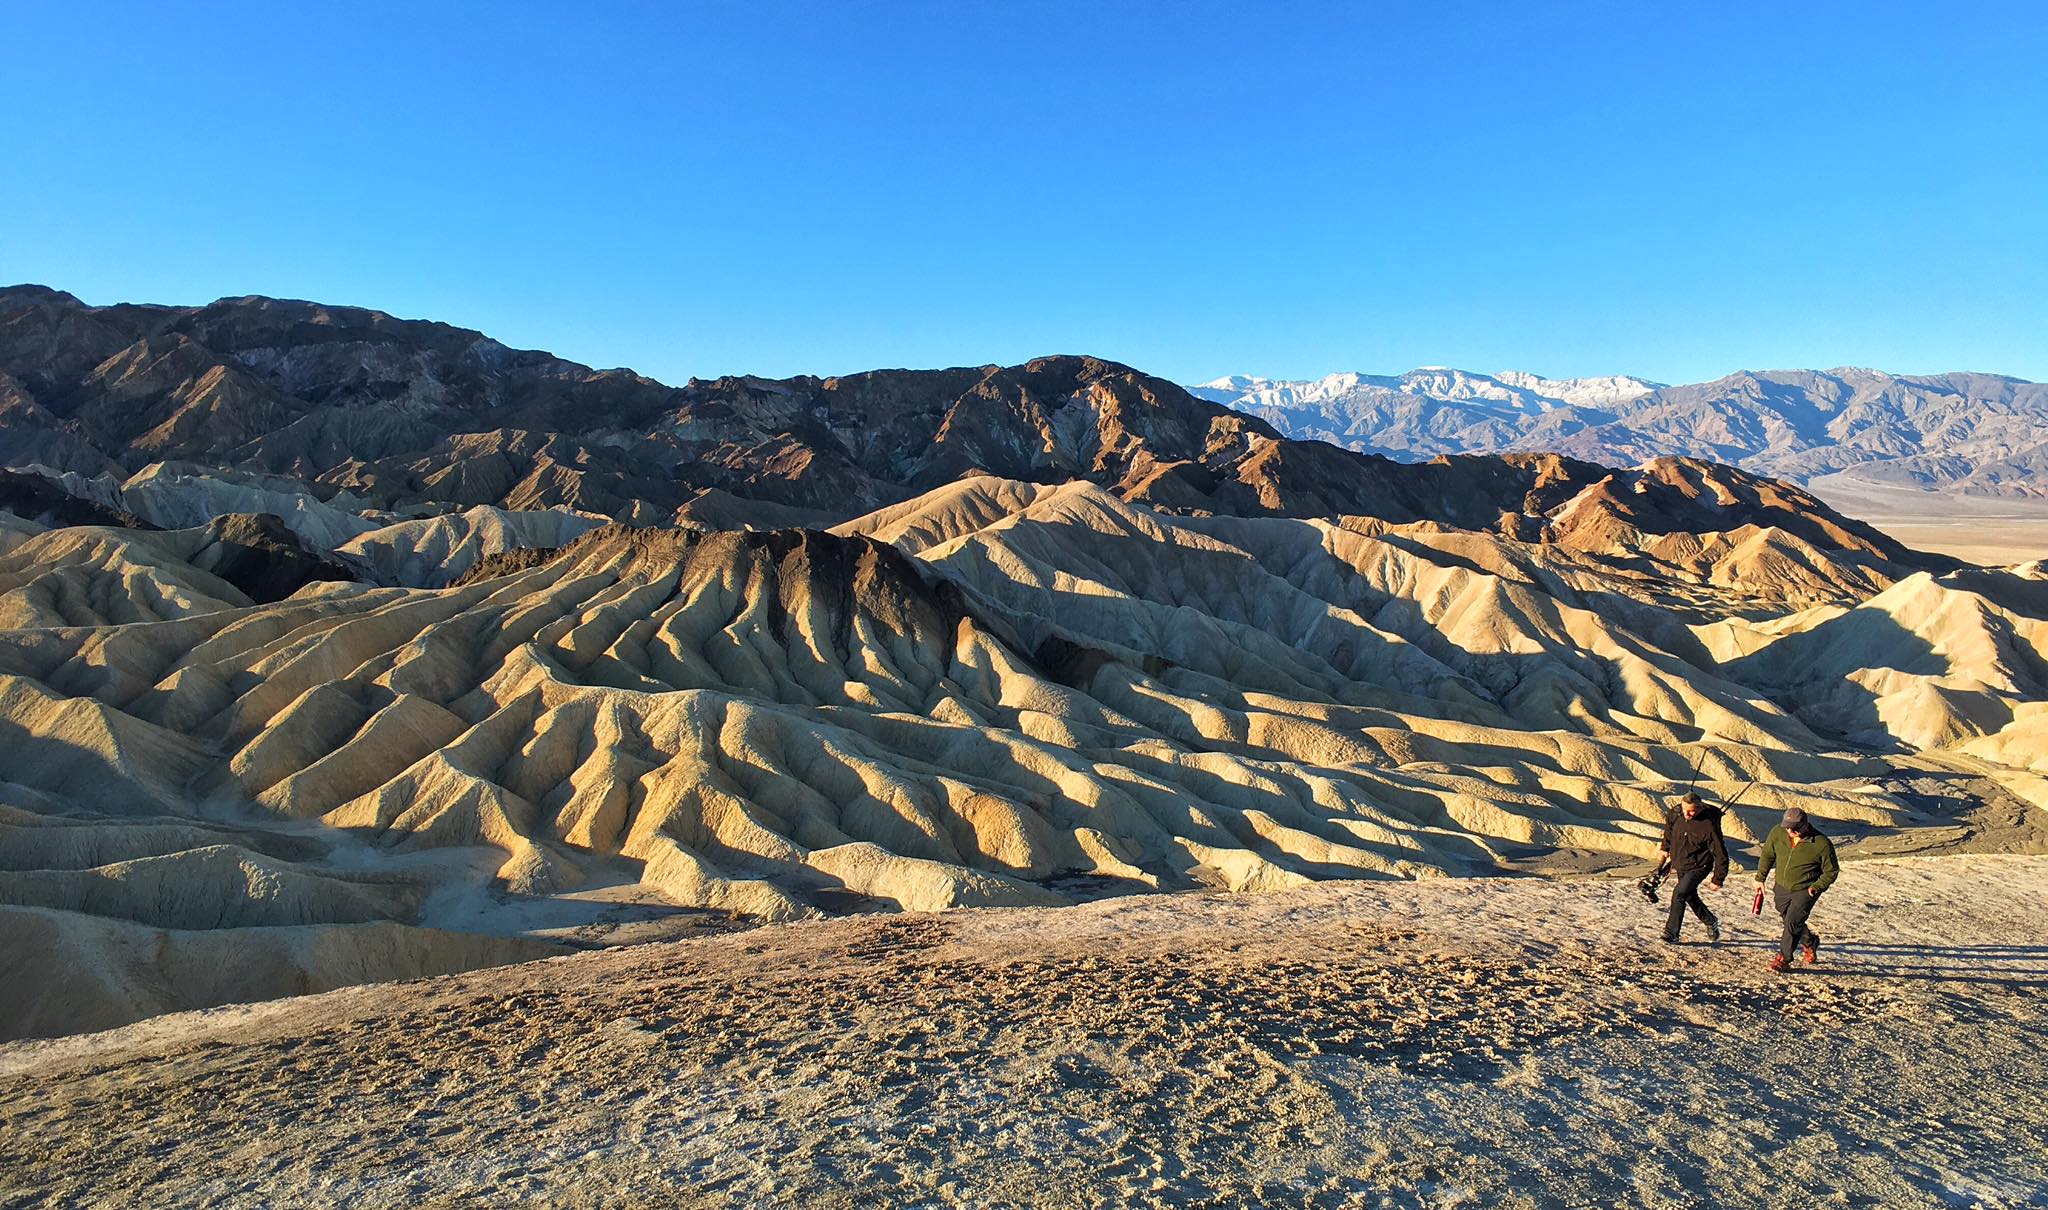
Canon 5D Mark IV, 70-200mm at 70mm, 1/320 sec., f/4.5, ISO 100
36°36’59” N 117°6’40” W
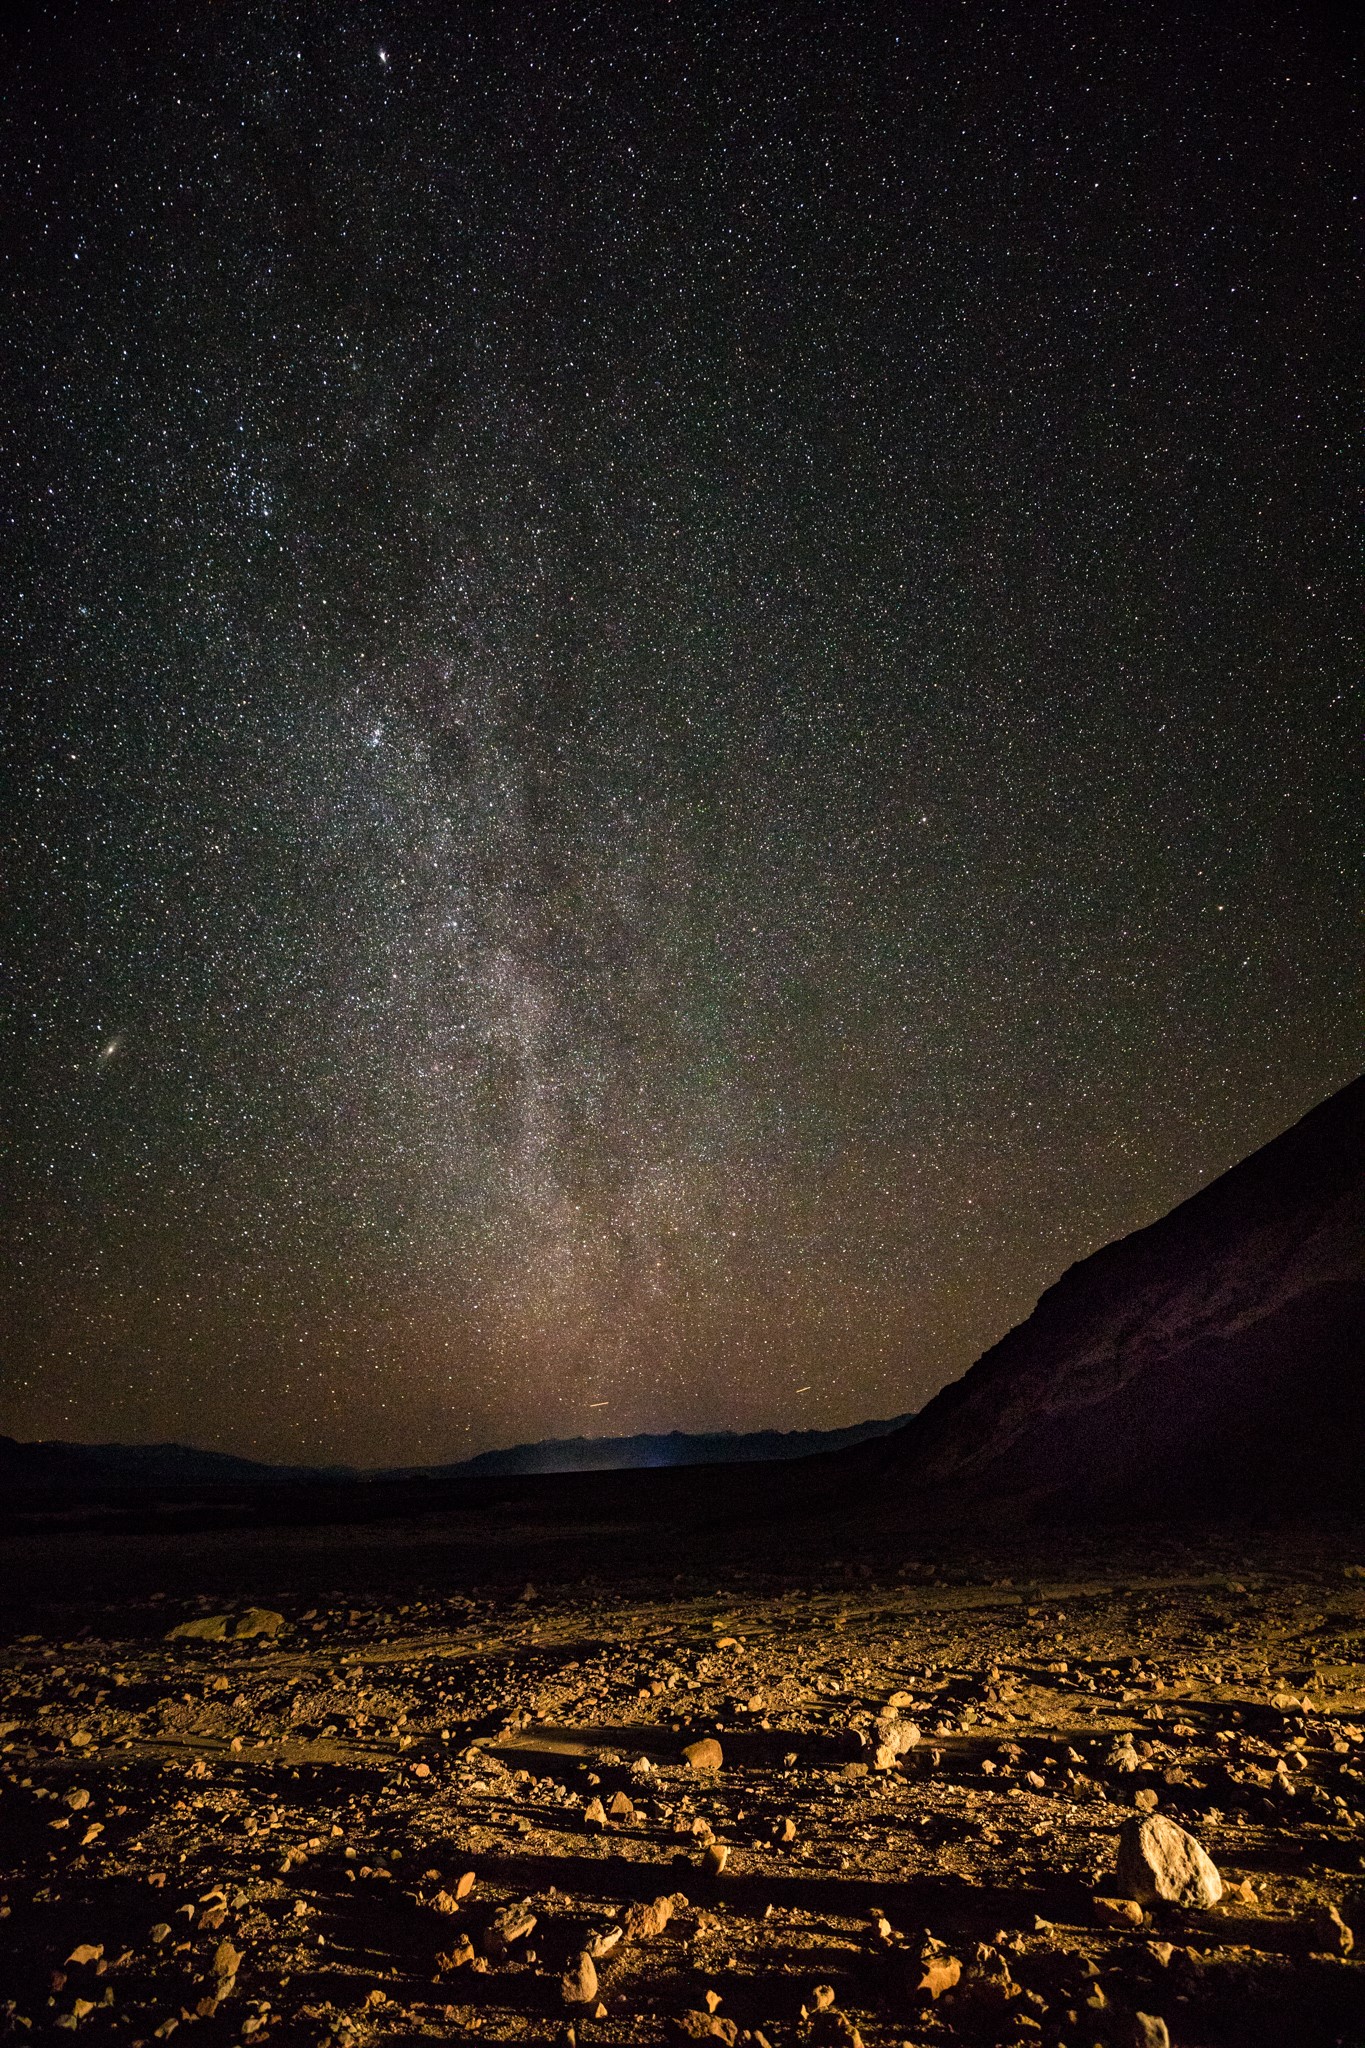
The Milky Way with lightpainted foreground (with warm LED flash light at a low angle). Note the Andromeda Galaxy in the center left.
Canon 5D Mark IV, 16-35mm f/2.8 III at 16mm, 20 sec., f/2.8, ISO 4000
36°25’14” N 116°50’49” W
Hope this article gives you some useful information and inspires you to make better images. I am available for hire for private one-on-one lessons on the use and functionality of your camera. I can be contacted via e-mail at fmelikian@yahoo.com